+44 (0)1905 794875
 Wholesale Prices

Speed Bump Installation Guide
Speed bumps are a simple and effective way to control vehicle speeds and improve safety in areas where pedestrians and vehicles share space. Installing them correctly can make a significant difference to their effectiveness and longevity.
In this article, we’ll describe the various types of speed bump and their key features, and provide a step-by-step guide to installation.
Where might you install speed bumps?
For the purposes of this article, we are talking about installing speed bumps on private roads and driveways. You can’t install your own speed bumps on a public highway - this is done by council-approved contractors and there are regulations about the positioning and accompanying signage.
Elsewhere, you can place speed bumps wherever there is a danger posed by people not obeying the speed limit. This can include company driveways, car parks, golf courses, airports, and access roads to factories, warehouses, and quarries.

Key features to look for when choosing a speed bump
Speed bumps are available in various materials, sizes, and finishes, and your choice will depend on the location and the type of traffic you’re expecting.
Material
-
Virgin PVC: This is the premium option - it’s hardwearing and usually the same colour throughout, so your speed bumps won’t wear from yellow to black over time.
-
Recycled PVC: The recycled version still performs very well, and has the bonus of being good for the environment.
-
Rubber: Granulated or needleised rubber is usually made from recycled truck tyres. It’s hardwearing and tends to deliver a smoother ride in general.
-
Hybrid: Start Safety's own-brand speed bumps are made from recycled PVC with a thick coating of virgin material for the yellow sections. It takes a very long time to wear through the plastic, making them high-performance but cost-effective.
Why do we not recommend tarmac or concrete speed bumps? It’s because the preformed ramps are more uniform in size, making vehicles much less likely to “ground out” (when the car hits the front of the bump) and incur damage.
Height
The height of the speed bump and the angle of the slope will dictate the approximate speed it can enforce. For example:
-
A 30 mm bump slows vehicles to 15 mph (perfect for golf courses or entrance roads)
-
50 mm = 10 mph (for car parks and driveways)
-
75 mm = 5 mph (for HGV traffic, as some cars - mainly sports cars - will ground out at this height)
It’s worth noting that longer speed bumps (such as the SiteCop Plus) can be taller without causing problems for cars, as we’ll mention in the next section.
Length and width
Customers frequently get confused over the length and width of speed bumps. The length is actually the distance over the hump, as viewed before you drive over it. The width is the other dimension - which might be the whole width of the road for a single ramp.

The length of the speed bump dictates the speed at which drivers can cross it. Shorter ramps feel much more abrupt as the vehicle travels over them, while longer versions give a smoother transition.
If the speed bumps are something like a metre long, you can get away with a taller height (such as 75 mm) even in a car park, because the transitions are more gradual. The ramps won’t cause cars to ground out, but will still do the job of slowing down HGV traffic.
Cable channels
Speed bumps are also handy when you need to run a hose or a cable across a driveway (for things like irrigation or powering electric gates). Many models feature a cable channel, which neatly houses the cable and prevents anyone from tripping over it.
Don’t confuse a cable channel with the space for a reinforcing bar. Many speed bumps include a reinforcing bar position - sometimes you can also use this to run a cable or hose, but not on all models.
Interconnectors
Most speed bumps are modular, with each section needing to be joined together in some way. Some, like the Ridgeback, have robust interlocking tabs to ensure that the ramps stay aligned. Reinforcing bars also help them to stay put.
Our own-brand speed bumps have “dog bone” connectors, which lock into the underside of the speed bump and allow the forces exerted by vehicles to be distributed across multiple sections.

Reflectors
Some speed bumps include reflectors to make them more visible at night and give drivers more time to react to the presence of the ramp. These include:
-
Traditional plastic reflectors, such as the ones you might see on bicycle wheels - these are effective but the plastic can eventually crack.
-
Cat’s eyes (like the ones in the middle of the road), which reflect the light from car headlamps back to the driver. These are small but hardwearing.
-
Reflective patches with layers of glass beads embedded in the surface. These can wear off over time.
Finish
In the daylight, when reflectors aren’t functioning, motorists still need to see speed bumps. That’s why many of them are coloured, often with alternating colours like yellow and black. The yellow triangles or sections stand out against dark tarmac or concrete.
There are several types of coloured speed bump:
-
Painted: The yellow sections are painted on. This is generally the cheapest offering but the colour will wear off over time and you end up with a plain black speed bump. Even a driver spinning their wheels over the ramp can be enough to rub off the paint.
-
Solid material: If the speed bump is made from virgin material throughout, the yellow sections will stay yellow even with wear and tear.
-
Uncoated: The black sections tend to be made from black material so are just natural in their appearance - they don’t really show wear and tear.
-
Hybrid: Recycled material on the inside with a thick coating of yellow material on the outside (shown below). These are very hardwearing - the next-best thing to solid material. You’d need to wear through around 2 cm of material to get to the recycled "core".

How to install speed bumps
With our handy guide, it’s simple to install speed bumps - even without much technical know-how.
All speed bumps come with the bolting locations pre-marked and often pre-drilled. For some ramps you may need a 10 mm pilot bit to mark where your fixings will go.
You will need
-
Fixings (most of our kits come complete with fixings suitable for both tarmac and concrete surfaces)
-
Chalk / crayon
-
SDS drill
-
10 mm for pilot holes
-
14 mm (SiteCop only)
-
16 mm (all speed bumps using universal fixing)
-
Ratchet / nut setter
-
16 mm (all speed bumps using universal fixing)
-
17 mm (SiteCop only)
-
PPE items

First steps
1. Find the right position
Now you need to find the optimum place to put your speed bumps.
Check that the location is free from utilities so that you don’t drill into a water main, electrical cable, or whatever it might be that's hiding under the surface.
Avoid putting speed bumps on a tight blind bend. Drivers won’t be expecting them and they’ll hit the bump hard, leading to an accident.
Straight sections work really well for locating speed bumps, because vehicles are travelling towards them in a straight line. There won’t be any turning motion or other forces going on as they navigate the ramps.
It’s also important to have the right spacing between speed bumps. This can be anywhere from 30 m up to 50 m, depending on the speed of the road. The idea is that drivers don’t have time to accelerate between each bump, or that it’s inconvenient or pointless to do so.
Make sure the ramps are centralised on the carriageway, but don't leave any gaps where drivers could sneak through.* It’s best practice to leave around 100 to 150 mm either side. This also allows enough space for water to pass through if there’s a heavy downpour, rather than building up and flooding over the kerb.
- The type of speed bump that only covers part of a traffic lane is called a speed cushion. These are designed to allow buses and large emergency vehicles to straddle them, while slowing other vehicles.
2. Consider supporting signage
It’s best to display signage to warn people that speed bumps lie ahead, giving them time to slow down. This can include post- or wall-mounted signs, or roundels on the road surface.

As well as messages such as “Caution - Speed Bumps”, you should also state the appropriate speed limit - otherwise drivers may hit the ramps at 60mph and then sue for damage to their vehicle.
By giving clear warnings, and by ensuring the signs are retro-reflective to show up in the dark, you have a comeback if anybody complains that they didn't know you had speed bumps.
On private property, we generally recommend that you put signs at the entrance stating the speed limit, then place the warning sign in the next 15 m or so.
For public highways, specific signage is used - for instance, the Speed Bumps Ahead sign or a 20 mph Zone sign to tell drivers they’re entering an area with traffic-calming features.
3. Measure and mark
Use a measuring tape and chalk or crayon to find the centre point of the road where you’re installing the speed bump, and use a chalk line to create a straight line. This will help you line up the sections neatly.
The installation
You’re ready to install the speed bumps. This process is pretty much the same for all models on the market.
1. Place the whole speed bump in line with the markings you created
2. If there are no existing holes in the speed bump, create them with the 10 mm pilot drill bit. If there are holes, you can still use this tool to mark drill locations through the ramp, or use chalk or crayon. Pilot drilling is normally easier.
3. Re-drill with the correct size of drill bit (14 mm for SiteCop; 16 mm for all other models if using the universal fixing)

4. Use the hole blower to remove dust and debris
5. Insert plugs into holes
6. Cut the reinforcing bar (if using) with an angle grinder or hacksaw, and insert it
7. Realign the speed bump sections with the markings and holes, and lock them with the built-in tabs or dog bone connectors (if they have them)
8. Insert the fixings into the plugs and fix them using the appropriately-sized socket/nut setter (17 mm socket for Sitecop; 16 mm nut setter for other models if using universal fixing).
Important: Don’t overtighten the fixings or you risk damaging the ramp - if you're using an impact driver, just tighten until you hear the first couple of clicks and then stop.
Maintenance
To make sure your speed bumps stay safely in place, you will need to check the fixings at regular intervals. The timeframe will depend on how much traffic-related wear and tear the ramps experience.
For example, if the speed bumps are on an incline and vehicles are braking as they travel over them going downhill, this will increase loading and you’ll need to check them more frequently.
You should also check for the colour wearing off painted speed bumps, and for any other damage.
The advantage with modular speed bumps is that if an individual section becomes worn or damaged, you can easily lift it out and replace it.

The takeaway
If you choose the right speed bumps for the application, and install them correctly, they will successfully slow traffic and improve safety on driveways, car parks, and access roads. Regular checks and maintenance will prolong their lifespan.
Ready to buy speed bumps and tools? Check out our wide selection, and don’t hesitate to contact our friendly sales team if you need any further advice or information.
You can also watch our video for visual instructions!
- Author
- Tags


You might like:
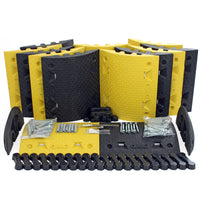
Speed Bumps Complete Kits 50mm 10mph
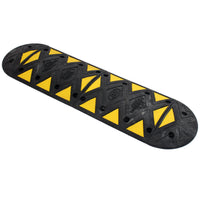
5mph Ridgeback Speed Bump Kits - 75mm
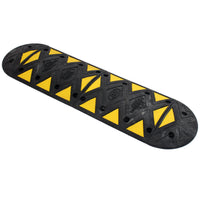
10mph Ridgeback Speed Bump Kits - 50mm
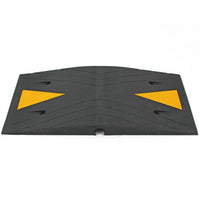
SiteCop Plus 70mm Rubber Speed Bumps For HGV's - Fixings Included
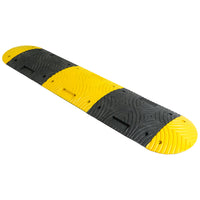
TopStop-Eco Painted Speed Bump Kits
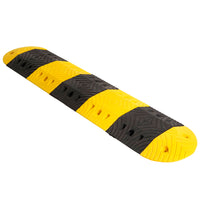
Reinforcement Tube For SiteCop Plus And Standard | 48 x 1200mm

Value Speed Bump Kit (Complete With Fixings & Drill Bit) Painted
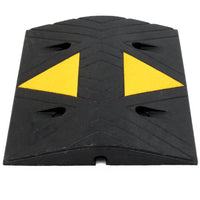
SiteCop Mini Compact 50mm Rubber Speed Bump - Fixings Included
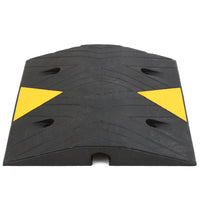
SiteCop Standard 70mm Rubber Speed Bump - Fixings Included
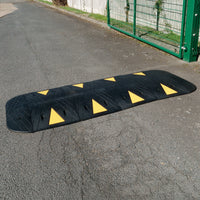
SiteCop Plus Complete Rubber Speed Bump Kit For HGVs - 70mm 5mph