How To Install A Bollard
There are many reasons why you might want to install a bollard - they’re useful for security, traffic control, and deterring unauthorised access. But what does the installation process involve?
In this article, we will take you through the different bollard types and use cases, and explain how to install a bollard in various settings.
What are bollards used for?
Bollards have all kinds of uses, from practical to purely decorative. Here are some of the most common use cases:
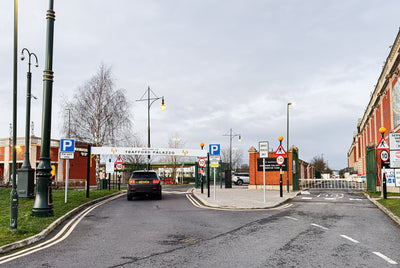
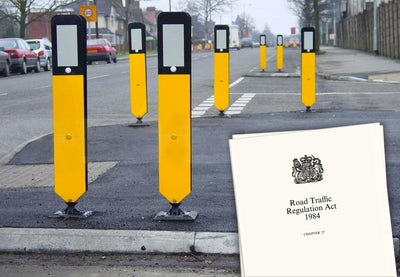
Traffic guidance
You will often see bollards marking out restricted zones and pathways, and warning drivers of soft verges or sharp turns. In congested areas, bollards act as a visual guide or deterrent and help to prevent accidents.
Parking management
Bollards can help to guide drivers into parking spaces and prevent unauthorized parking on private driveways or restricted areas.
Security
You can install impact bollards to form a security barrier around a building or zone. Anti-ram bollards will stop a vehicle from crashing through walls, windows or doors.

Asset protection
Bollards also offer physical protection for buildings and assets, particularly in places where forklifts or heavy goods vehicles might cause damage.
Aesthetics
Decorative or ornamental bollards add visual appeal, as well as guidance for vehicles or pedestrians.
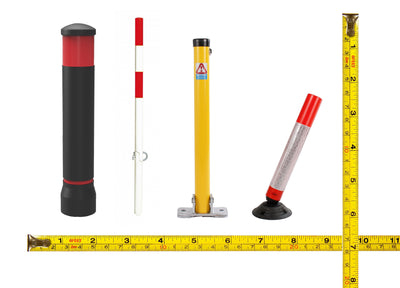
Types of bollard
Let’s have a quick look at the main types of bollard available:
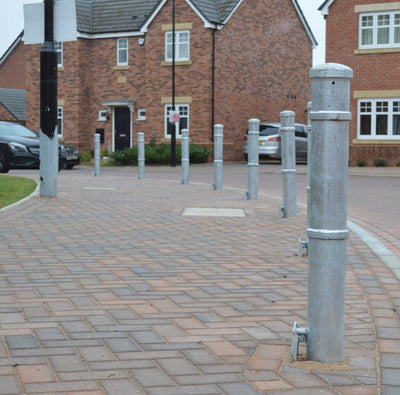
Fixed bollards
Fixed bollards remain in place permanently, installed with either bolt-down or cast-in fixing methods. This category includes anti-ram bollards, which have a tough steel core.
Spring-back bollards
Spring-back or self-righting bollards are fixed in position, but they flex and spring back into place after a vehicle has knocked into them or even driven over them.
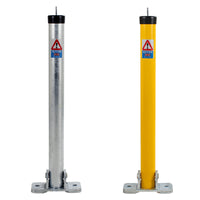
Drop-down bollards
Also called hinged or folding bollards, these offer flexible access control as you can either use them in the upright position or fold them flat. Stealth bollards lie completely flush to the ground when folded.
Retractable or telescopic bollard
Retractable bollards drop right down into the ground when not in use. (These will require a deep hole to accommodate the base or sleeve.)
Removable bollards
These bollards allow you to lift them out of position, and are often used in areas where occasional access is required.
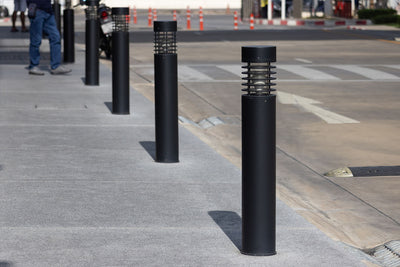
Illuminated bollards
Seen on pathways and in parks, bollards with integral lighting often use solar power or motion sensors to save energy.

How to install a bollard
Now to our main topic: how to install a parking bollard. The equipment and components required for each method will differ depending on the bollard model, but here are some of the things you may need:
-
PPE (safety goggles, gloves, dust mask)
-
Tape measure
-
Chalk and marking pen
-
Pilot drill and/or core drill
-
Auger or post-digging shovel
-
Concrete mix
-
Gravel or aggregate (regular and fine)
-
Trowel

First steps
Before you start the installation:
-
Measure out the spacing for your bollard(s). This will depend on the application - for example, in a car park, you’ll want to leave room for pedestrians and wheelchair users to move between the posts.
-
If you’re installing several bollards in a row, use a chalk line kit and a tape measure to ensure a straight line.
-
Check your site plans for any underground cables or pipes.
Now let’s go through the different methods for installing bollards.
Bolt-down method
If it’s not possible to dig into the surface, you can install a bolt-down or surface-mounted bollard.
1. Ensure the surface is appropriate for fixing the post. We recommend approximately 400mm x 400mm x 400mm of concrete as a footing for each bollard (but for low-risk applications such as decorative bollards, you can use the pre-existing slab if it’s thick enough).
2. Place the bollard at the mounting point and mark out where you’ll drill the holes (with marker pen or a pilot drill), using the base plate as a template.
3. Drill the holes using the appropriate size of drill bit.
4. Blow the dust out of the hole with a hole blower or compressed air
5. Secure the fixing plug in the hole (if there is one).
6. If using shield anchors, pass each anchor into its hole through the base of the bollard.
7. Tighten the fixings.
Next, we’ll explain how to install a bollard post in a concrete or tarmac foundation - for which there are several methods.
Casting-in ragged method
With the ragged cast-in method, you’ll use a bollard with a "ragged" end, which means it’s spiked or flared. This is embedded directly into a new concrete foundation.
1. Excavate a hole with a depth of roughly one-third of the bollard’s above-ground height (typically 300-600mm) and wide enough to fit the bollard.
2. Place the bollard in the hole, holding it in place to ensure it stands upright.
3. Make sure the post is level and at the correct height.
4. If you’re installing the bollard in an existing concrete area, backfill the hole with concrete until it’s level with the surface then trowel the top for a smooth finish.
5. For tarmac surfaces, make sure the concrete filling is shy of the surface so there’s room to lay a final tarmac dressing over the top (or bring the concrete up to the finished surface level).
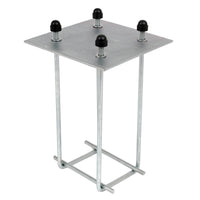
Casting-in cage method
The alternative for casting-in is to use a foundation cage. This is sunk into the ground, leaving four protruding studs on which to fix the bollard. It gives a firmer footing in areas where there is no existing concrete to secure to.
1. Excavate a hole approximately 350mm x 350mm x 300mm deep (or roughly one-third of the bollard’s above-ground height).
2. Assemble the cage according to the manufacturer’s instructions. This usually involves placing the plate over the threads and securing with nuts and washers.
2. Fill the hole with prepared concrete mix.
3. Place the cage in the concrete, frame side down, and use a spirit level to ensure the top plate is level and flush with the surface.
5. Once the concrete has set, remove the temporary nuts and washers and fit the bollard over the protruding threads.
6. Replace the washers and nuts and tighten them.

Installing a drop-down / telescopic bollard
1. Dig a hole to the depth described in the bollard’s manual or data sheet (usually about 1.3 times the height of the bollard).
2. Fill the bottom with coarse gravel to allow drainage.
3. Place the bollard into the hole and ensure it is level.
4. Backfill with a finer aggregate or gravel, to 300-400 mm from the top.
5. Backfill the remaining space with concrete, and trowel the top smooth.
6. We recommend leaving the socket approximately 5mm proud of the finished surface level to encourage rain water to flow around the socket.
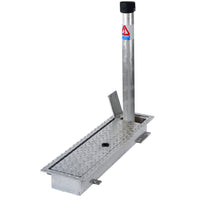
Installing a socket for a removable bollard
1. Dig a hole to the depth described in the bollard’s manual or data sheet (usually about 0.3 times the height of the bollard).
2. Fill the bottom with coarse gravel to allow drainage
3. Place the bollard socket into the hole and ensure it is level.
4. Backfill with concrete and trowel the top smooth.
5. We recommend leaving the socket approximately 5mm proud of the finished surface level to encourage rain water to flow around the socket.
6. If you want an additional ground socket elsewhere (for when the bollard is not in its main position), repeat the above process in the second location.
Closing thoughts
Our step-by-step guide should enable you to install a bollard in your chosen location, whether it’s a public car park or a private driveway. If you need any further help with choosing or installing your bollards, just give our friendly sales staff a call.
FAQs
How much does it cost to install a bollard?
There’s no standard cost for bollard installation, as it depends on the bollard type and the number of bollards you need. If you’re not doing the work yourself, you’ll also need to factor in labour costs.
Do I need planning permission for bollards?
If you own the land and your parking space, you should be able to install bollards with no problems. But it’s always best to double-check with your local council in case there is additional legislation covering your property or area.
Leaseholders don’t usually need planning permission, but you will need to seek approval (and ideally written consent) from your landlord or property management company.
- Author
- Tags

You might like:
Autopa Galvanised Padlock Parking Post Folding / Hinged 730mm x 60mm
Cast In Fixing Kit For Duraflex Bollard | Foundation Cage

Duraflex Self Righting Traffic Bollard | NAL Compatible
Autopa Galvanised Stealth Flush Fold Parking Post 660mm x 60mm
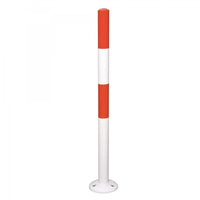
Traffic Line Removable Bolt Down (Screw Fix) Barrier Post Bollard Red/White 1000mm
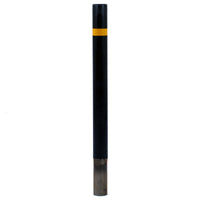
StreetWise Steel Cored Polyurethane Bollard With Removable (Socket) Fixing
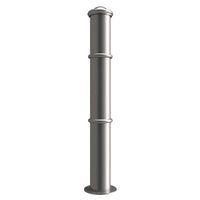
Autopa Ornamental Galvanised Steel Bollard 1000mm - GFC1500 (No Fixings)
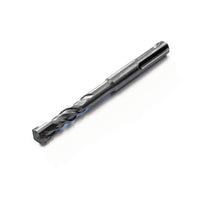
10 x 110mm SDS+ Masonry, Concrete & Tarmac Drill Bit

UltraCrete QC10F 10mm Rapid Set Flowable Concrete 25kg
