How To Install a Gravel Driveway: a Step-by-step guide
Laying a gravel driveway is a quick and easy way to increase the amount of parking at a property, be that a home address or a business address. When installed correctly, they also allow water to freely drain away, reducing surface water runoff and localised flooding, something that has become more important than ever in recent years due to changes in the weather.
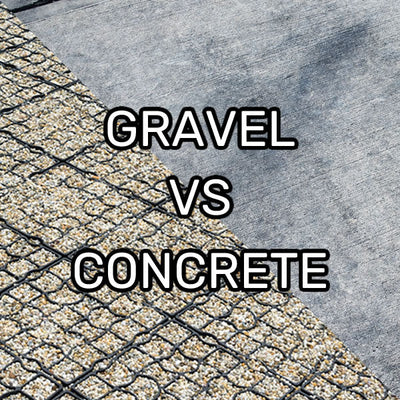
A gravel driveway is also a welcome alternative to concreting over an area, due to the sustainable drainage that gravel offers. Since 2005, over 3 million front gardens in the UK have been completely paved over (according to a study by the RHS), causing issues with water runoff and heat islanding..
There are two ways to install a gravel driveway, a ‘traditional way’ and a modern way using new materials such as permeable paving. We will be covering the latter in this article as it gives better and more reliable results that can be used with confidence in all settings.
The installation process we are going to cover here will be more suited to the home installer, with larger-scale installations using much of the same processes but with a requirement for heavier equipment to make the job faster. We will assume that the driveway is being extended into a grassed area from an existing tarmac or concreted area.

What are Permeable Pavers?
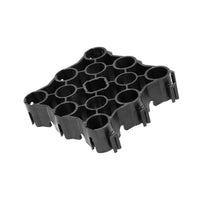
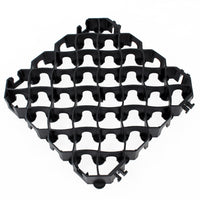
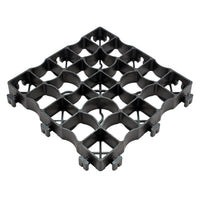
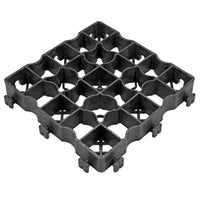
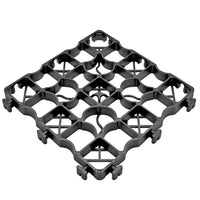
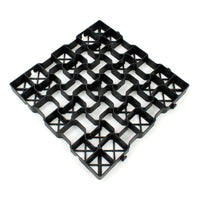
Permeable pavers, often also referred to as grid pavers, grass pavers, or gravel pavers, are modern interlocking tiles designed for landscaping projects. They are often made from plastic and offer structural support while also allowing water to drain through them freely. They are used on projects of all sizes, from garden pathways to shed foundations right through to extended parking at theme parks and light airport runways.
Scoping the Project
Before starting, you will need to measure up to calculate what materials you need, this will not only indicate the quantity of grid pavers you need, but also the amount of infill material, such as gravel or slate, you need. It will also give you a good idea of the total material cost of the project.

You should keep the following in mind while measuring up;
- The size of the vehicles using the area
- Will pedestrians need to walk between the vehicles?
- Is there enough room to open car doors if vehicles are parked side by side?
Materials required;
- Chosen brand and duty of grid
- Permeable weed membrane
- Sharp sand
- Gravel Infill
- MOT gravel
- Coarse drainage gravel (hardcore)
- Temporary Line Marking paint
Other equipment you may need;
- A wacker plate (for compacting larger areas) or Tamper (for smaller areas)
- Skip Hire - If you are removing large areas of topsoil or an existing driveway, you will need to remove the waste.
Breaking Ground for Your Gravel Driveway
To ensure that your driveway stands the test of time, it must be built upon a sturdy foundation. To build this foundation, you will need to make an excavation the same size as your proposed new parking area.
- Measure and mark the area you plan to convert into a gravel driveway using your line marking spray. Double check your measurements, as it is a lot easier to correct any mismeasurements now than later.
- Remove any turf from the area.
- Dig down and remove any loose topsoil down to a total depth of around 200mm for light vehicle use, or 300mm for heavier vehicles. You are looking to find a solid layer of undisturbed soil that you can build your foundation on.
- Tip: If your soil has a high clay or peat content and does not drain well, you may need to dig down a little further. For example, in clay-rich soil, you may need to dig as deep as 12 inches even for lighter vehicles.
Building the Foundation of Your Gravel Driveway
Now that you have excavated the area to be converted into a driveway, it's time to start layering in our aggregates to produce a free-draining yet sturdy foundation.
- Install a geotextile membrane (optional) - For clay or peaty/spongy areas, installing a suitable lower geotextile membrane is recommended to prevent subsoil from mixing into the layers above. The membrane should be strong, yet also permeable, allowing water to drain away freely.
- Drainage layer - Build up your level using larger crushed stone until it reaches around 20-30mm plus the depth of your chosen grid height from your desired finished surface. Use a wacker plate or a hand tamper to compact the drainage layer. This will reduce movement and prevent compaction after installation.
- Lay another permeable membrane over the crushed stone; this will prevent the next layer from washing away in the rain and seeping into the sub-layers. Choose a membrane that is tough and won't puncture.

Levelling Up Your Gravel Driveway
To achieve optimal results, ensure that the surface is smooth and flat, ideally with a 1-1.5% gradient for effective surface water runoff.
-
Lay a bed of around 20-30mm sharp sand on top of the membrane; this can be raked flat, being careful not to puncture the underlying membrane.
-
Once done, pack the sand down again using a wacker plate and check the level once more. Repeat as necessary until everything is flat without undulations.

Laying the Grid System
Most grid systems interlock, spreading the load across a wider area. With this in mind, it is very important to install the grid in a set pattern.
- Starting from a corner or a flat edge, lay your grids section by section. Do not start laying the grids from two different starting points, as you will run into issues interlocking the tiles later on.
- Work outwards in a grid, interlocking the tiles as you go.
- If and when you need to make cuts, this can be done easily using a circular saw, a jigsaw or a hand saw.
- We recommend leaving a gap around the edge of the installation for expansion and contraction, especially on larger installations where thermal expansion can be more prominent.
- If installing the grid on a significant slope, or where vehicles could potentially “drag” the grid in one particular direction, use pins to hold the grid in place.
Tip: Before laying the grid, consider installing an edging system to prevent grass from migrating into your driveway. We will cover this in another article, as there are several options you can use.
Finishing the Job
At this point, your grid should be running flush to the surrounding area and be firm enough to walk on without any spring or bounce. It is now time to fill in the grid with your chosen gravel or slate. Most grids will specify a maximum and minimum size of aggregate to use when infilling, but it is generally around 20mm that is seen as most popular.
Using a combination of wheelbarrows and shovels, you can manoeuvre the gravel into place, being careful not to let the gravel spill over onto the surrounding grass or soil areas. If you have access to a wacker plate, it is a good idea to run it over the grid once it is full; this will vibrate the gravel and help it settle. You may need to add further gravel should any settlement occur.
Need Help Finding The Best Gravel Grid System for Your Gravel Driveway?
We are here to help provide advice and guidance when choosing a grid for a gravel driveway. Although this guide focuses on the installation of a domestic driveway, we supply grids that are suitable for HGV traffic and even tank traffic, allowing sustainably drained parking areas to be created in a variety of settings. You can browse our full collection of gravel driveway grids online.
Should you need to talk to someone about your project, pick up the phone and call us on 01905 794 875 or use our contact form. One of our friendly staff will help you get the right product at the right price.
- Author
Related articles


You might like
EnduraGrid Ground Reinforcement / Grass Grids Driveway - 500mm x 500mm x 65mm (5mm Thick)
EcoGrid E40 Medium Duty Ground Reinforcement Grid System - 330mm x 330mm x 40mm (5mm thick)
EcoGrid E50 Heavy Duty Ground Reinforcement Grid System - 330mm x 330mm x 50mm (7mmm Wall Thickness)
EcoGrid E30 Pedestrian Ground Reinforcement Grid System - 330mm x 330mm x 30mm (4.4mm thickness)
GeoGrid Premium HoneyComb Plastic Pavers Gravel Grids - 495mm x 495mm x 40mm (4mm thickness)