Thermoplastic Road Markings

Thermoplastic Road Markings

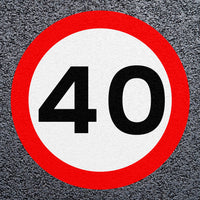
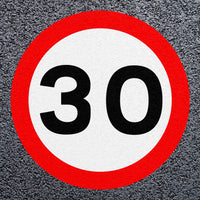
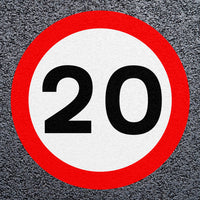
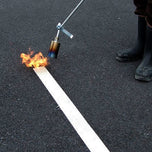
There is no easier way to mark out the bays in smaller car parks than with thermoplastic road markings, these pre-cut and preformed markings are melted onto the road surface with a gas torch, permanently bonding it to the tarmac or concrete. To highlight charging bays and disabled spaces, coloured logos can be installed alongside speed roundels and even hazard warnings allowing you to quickly improve the safety and organisation of an area.

Read more
Preformed Thermoplastic Anti Skid Sheets | 5 Pack
£137.61 excl. VAT
£165.13inc. VAT
Start Traffic
  • In Stock
  • ROADliner Line Marking Trolley - Single or Twin Can
    ROADliner Line Marking Trolley - Single or Twin Can
    From £181.89 excl. VAT
    From £218.27inc. VAT
    Proline
  • In Stock
  • 3M Stamark A715 Roadmark Blanking Tape Sold By The Metre - Black
    3M Stamark A715 Roadmark Blanking Tape Sold - Black
    £682.07 excl. VAT
    £818.48inc. VAT
    3m
  • In Stock
  • 3M Stamark A710 Temporary Pavement Marking Tape - White
    3M Stamark A710 Temporary Pavement Marking Tape - White
    £852.42 excl. VAT
    £1,022.90inc. VAT
    3m
  • In Stock

  • Preformed Thermoplastic Road Marking Paint

    StartMark is our best selling thermoplastic marking system. It is the perfect material for surface markings on roads, cycle routes, footpaths, car parks, playgrounds and industrial sites.

    Unlike “normal” paint these thermoplastic marking products come in pre-cut lines, shapes, letters, numbers and symbols. This makes creating clean, sharp markings a simple task that almost anyone can do.

    Boost road safety in small and large car parks by properly marking out parking bays, direction arrows and give way symbols. All of these simple additions to a car park can assist road users in understanding the proper flow and parking etiquette.

    Who Uses Thermoplastic Markings?

    • Schools - With a selection of preformed games and puzzles available fun interactive areas can be created to enhance learning and inspire imagination.
    • Supermarkets - Use disabled parking bay markings and parent-child markings to ensure there are adequate spaces reserved for those that need more space.
    • Councils - Mark cycle routes with clear directions or route numbers. Line marking paints can also be used to mark centre lines just as you would see on the road.
    • Supply Chain - Mark loading bays with numbers, or create zebra crossings with our thermoplastic zebra crossing pannels.
    • Service Stations - Mark out electric vehicle charging points with clear and colourful symbols that are easy to recognise.
    • Apartment Complexes - Number parking spaces for individual residences, keeping parking battles from occurring!
    Thermoplastic Used to Mark Parking Bays

    Common Types of Thermoplastic Markings:

    Thermoplastic Disabled Symbol

    Disabled Symbols

    Mark parking bays for disabled users in a clear way.

    Thermoplastic give way triangle

    Junction Markings

    Use thermoplastic give way triangles at junctions to ensure that traffic yields where it needs to.

    Thermoplastic bike lane symbol

    Bike Lane Markings

    Available in a variety of formats road studs are perfect providing either tactile feedback to pedestrians or improved visibility for motorists. Studs can either be plastic or metallic, permanent or temporary, and reflective or non-reflective.

    Thermoplastic lines in assorted colours

    Rolls & Lines

    Easy to roll out with one roll being the correct length for one side of one parking bay.

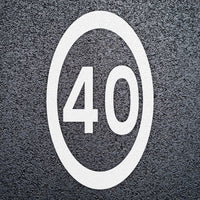
    5 and 10 miles per hour thermoplastic speed roundels

    Speed Roundels

    Further, enhance speed limit visibility in car parks and on roads.

    Bespoke Markings

    With our CNC cutting machines and a wide array of colours, we can create a huge variety of shapes, symbols and designs. This can be used to brand parking spaces with a company logo, corporate branding at theme parks and venues, directional markings that match with a theme. The possibilities are endless!

    The Installation Process:

    1. Ensure that the area to be marked out is clean, free of grease, oil, road salt, and moisture. Any loose grit or debris should be swept away to ensure you get the best results.
    2. If you are marking old tarmac, block paving or concrete you will require a primer. This is available in aerosol form, or in a 5-litre container. If you are applying to new tarmac you can skip this.
    3. Lay your markings on the ground and position them so you are happy with the layout. It is vital that the position is correct, as once you carry out the next step the markings will be permanent.
    4. Use a gas burner to heat and melt the markings onto the ground. During the heating process, glass beads can be added to enhance the skid and slip resistance of the thermoplastic material.
    5. After things have cooled down you are done! This usually only takes a few minutes and you can allow traffic to use the area.
    .